


Installing PVC wall panels on a partition wall is a cost - effective and aesthetically pleasing way to transform the look of a space. As a PVC Wall Panel supplier, I've had the opportunity to see firsthand the impact these panels can have on a room. In this blog post, I'll guide you through the step - by - step process of installing PVC wall panels on a partition wall.
Step 1: Preparation
Before you start the installation process, it's essential to gather all the necessary tools and materials. You'll need a measuring tape, a level, a utility knife, a saw (either a hand saw or a power saw depending on your preference and the complexity of the cuts), a drill, screws, a caulking gun, and of course, your PVC wall panels. Make sure to choose high - quality PVC Wall Panel that suits your design and budget requirements.

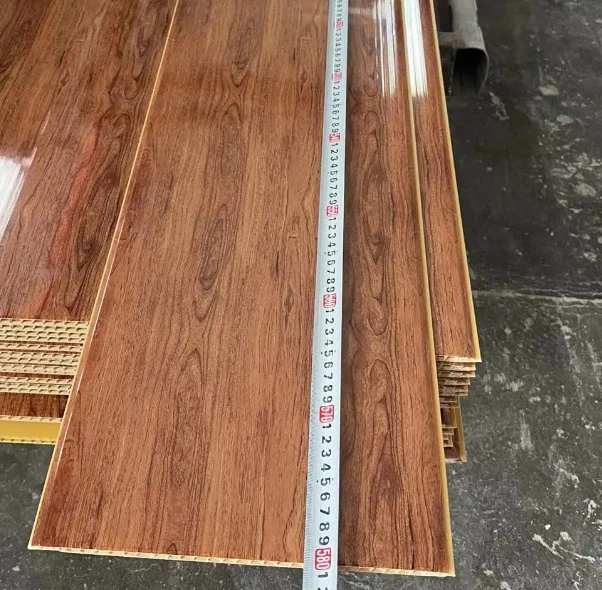
Next, measure the partition wall accurately. Measure the height and width of the wall at multiple points to account for any irregularities. This will help you determine how many panels you need to purchase. It's always a good idea to buy a few extra panels to account for any mistakes or future repairs.
Clean the partition wall thoroughly. Remove any dust, dirt, or debris from the surface. If there are any bumps or rough areas, sand them down to create a smooth base for the panels. A clean and smooth surface will ensure better adhesion and a more professional - looking finish.
Step 2: Marking the Wall
Use a level and a pencil to mark a horizontal line at the top and bottom of the partition wall. These lines will serve as guides for installing the first row of panels. Make sure the lines are perfectly straight, as this will determine the alignment of all the subsequent panels.
If your partition wall has any outlets, switches, or other fixtures, mark their locations on the wall. You'll need to cut holes in the panels to accommodate these fixtures later in the installation process.
Step 3: Cutting the Panels
Measure and cut the PVC wall panels to the appropriate length. If you're using a hand saw, score the panel along the cutting line with a utility knife first to make the sawing process easier. For more precise and faster cuts, a power saw can be a great option. Just make sure to wear appropriate safety gear, such as goggles and a dust mask, when using power tools.
When cutting the panels for areas around fixtures, use a jigsaw or a hole saw. Place the panel over the marked fixture location on the wall and trace the outline. Then, carefully cut out the hole using the appropriate tool.
Step 4: Installing the First Row
Start by applying a bead of construction adhesive or panel adhesive along the back of the first panel. Make sure to apply the adhesive evenly, leaving a small gap around the edges to prevent the adhesive from squeezing out when the panel is pressed against the wall.
Carefully place the panel against the partition wall, aligning it with the horizontal guide line at the bottom. Press the panel firmly against the wall, starting from the center and working your way out to the edges. Use a level to ensure the panel is perfectly vertical.
If your panels have a tongue - and - groove system, make sure to align the tongue of one panel with the groove of the next panel. This will create a seamless joint between the panels. Secure the panel to the wall using screws. Drill pilot holes through the panel and into the wall studs or the backing material, and then insert the screws. Space the screws evenly along the edges and in the center of the panel.
Step 5: Installing the Remaining Rows
Continue installing the remaining rows of panels in the same manner as the first row. Make sure to stagger the joints between the panels for a more aesthetically pleasing look. This means that the joints in one row should not line up with the joints in the adjacent row.
As you install each row, check for level and alignment regularly. Use a rubber mallet or a block of wood and a hammer to gently tap the panels into place if they need adjustment.
When you reach the top of the wall, you may need to cut the last row of panels to fit. Measure the remaining space and cut the panels accordingly. Apply adhesive and secure the last row of panels to the wall.
Step 6: Finishing Touches
Once all the panels are installed, use a caulking gun to apply caulk along the joints between the panels and around the edges of the wall. This will seal the joints and prevent moisture from seeping in. Choose a caulk that matches the color of your panels for a more seamless look.
Trim any excess caulk with a utility knife while it's still wet. This will give your installation a clean and professional finish.
If you want to add a decorative touch, you can install PVC trim or molding around the edges of the partition wall. PVC trim is easy to cut and install, and it can enhance the overall appearance of the wall.
Benefits of Using PVC Wall Panels
There are several benefits to using PVC wall panels on a partition wall. Firstly, PVC panels are highly durable. They are resistant to moisture, mold, and mildew, making them an ideal choice for areas with high humidity, such as bathrooms and kitchens.
Secondly, PVC wall panels are easy to clean. You can simply wipe them down with a damp cloth and mild detergent to remove dirt and stains. This makes them a practical option for both residential and commercial spaces.
In addition, PVC wall panels are available in a wide range of colors, patterns, and textures. Whether you're looking for a modern, sleek look or a more traditional style, you can find a PVC wall panel that suits your design preferences.
Moreover, installing PVC wall panels is a relatively quick and easy DIY project. Compared to other wall covering materials, such as tile or wallpaper, PVC panels can be installed in a fraction of the time and with less mess.
Related Products: PVC Ceiling Panel
If you're interested in enhancing the look of your entire room, you might also consider using PVC Ceiling Panel. PVC ceiling panels offer similar benefits to PVC wall panels, including durability, easy installation, and a wide range of design options. They can create a cohesive and stylish look when used in combination with PVC wall panels.
Conclusion
Installing PVC wall panels on a partition wall is a straightforward process that can significantly improve the appearance of a room. By following the steps outlined in this blog post, you can achieve a professional - looking installation that will last for years to come.
As a PVC Wall Panel supplier, we are committed to providing high - quality products and excellent customer service. If you're interested in purchasing PVC wall panels for your project, we'd love to hear from you. Contact us to discuss your requirements and explore our wide range of PVC wall panel options. We're here to help you create the perfect space with our top - notch PVC wall panels.
References
- "PVC Wall Panels Installation Guide", Manufacturer's Manual
- "Home Improvement Handbook", DIY Publishing Company


